ZYNQ下lwip的使用
[TOC]
lwip (Lightweight IP)
lwIP 是用于嵌入式系统的开源TCP / IP网络协议栈。针对嵌入式设备上有没有跑操作系统,lwip提供了两套api:
- Raw/native API
这是一个事件驱动的API,设计为在没有实现操作系统的情况下使用。这个API也被核心栈用于各种协议之间的交互。它是在没有操作系统的情况下运行lwIP时惟一可用的API。 - Socket API
bsd风格的套接字API。线程安全,只能从非tcpip线程调用。
底层的东西待会再说,赛灵思又两个文档,一个旧的XAPP1026(2014.11.21)和一个新的XAPP1306(2017.08.08)个人觉得旧文档参考价值大一点1
在这里为了方便 我就取了官方的例程(lwip_example)来说明,
pl端只有一个zynq的ip,里面需要配置一点东西ddr,时钟那些就不说了
要在这里根据板子来设定io
如果用的是赛灵思家的软核那也可以,不过就自己折腾吧
步骤
官方文档中给了4个应用实例:
- Echo Server(回传服务器)
- Web服务器
- TFTP服务器
- TCP RX与TX吞吐量测试
但是这些我们都先不管,我们先来看看官方文档中给出的步骤是怎样的(下面就是翻译):
使用Socket API创建lwIP应用程序
lwIP Socket API与Berkeley / BSD套接字非常相似。 因此,编写应用程序本身应该没有问题。 唯一的区别在于与lwIP 1.4.1库和xilkernel(或FreeRTOS)耦合的初始化过程
1. 对于使用Xilkernel的基于MicroBlaze处理器的系统,请为Xilkernel配置静态线程。 在示例应用程序中,该线程名为main_thread。 另外,通过指定系统中断控制器来确保正确配置了Xilkernel。 对于使用FreeRTOS的基于Zynq-7000 AP SoC的系统,在启动FreeRTOS调度程序之前,先创建一个名称为main_thread的任务。 有关套接字应用程序的信息,请参见main.c,以了解Xilkernel / FreeRTOS的任务/线程初始化的详细信息。
2. 主线程使用lwIP_init函数调用初始化lwIP,然后使用sys_thread_new函数启动网络线程。所有使用lwIP Socket API的线程都必须使用lwIP提供的sys_thread_new函数来启动
3. 主线程使用xemac_add函数添加网络接口。该函数接受接口的IP地址和以太网MAC地址,并对其进行初始化
4. 然后,在网络层线程初始化之后,需要运行xemacif_input_thread。 使用Xilinx适配器时,lwIP操作需要此线程。 该线程处理从中断处理程序接收到的数据移动到lwIP用于TCP / IP处理的tcpip_thread。
5. lwIP库现在已经完全初始化,可以根据应用程序的需要启动其他线程。
使用RAW API创建lwIP应用程序
lwIP RAW API更加复杂,因为它需要lwIP内部的知识。原始模式程序的典型结构如下:
- 使用lwIP_init初始化所有lwIP结构
- 初始化lwIP之后,可以使用xemac_add 函数添加以太网MAC。
- 因为Xilinx lwIP适配器是基于中断的,所以在处理器和中断控制器中启用中断
- 设置一个定时器,以固定的间隔来中断。通常,间隔约为250毫秒。在计时器中断中,更新必要的标志,以便从前面解释的主应用程序循环中调用lwIP TCP api、TCP_fasttmrtcp和TCP_slowtmr。
- 初始化应用程序后,主程序进入执行包接收操作的无限循环,并执行它需要执行的任何其他应用程序特定的操作。
- 包接收操作(xemacif_input)处理中断处理程序接收到的包,并将它们传递到lwIP,然后lwIP为每个接收到的包调用适当的回调处理程序。
lwip的小东西
上面的过程我想大家已经看出,这里补充一些lwip的小东西,以帮助理解为什么要这样做:
- Socket API是基于RAW API实现的
- 使用RAW API编程,用户编程的方法是向内核注册各种自定义的回调函数,回调函数是与内核实现交换的唯一方式.
- 在后面会出现一个东西叫pcb 他指的是protocol control block 协议控制块
- lwip的内存管理,一种是链表,一种是堆,详情可看参考文献,引入一个数据包管理结构pbuf
- 在lwip的实现中,每一层都会有单独的线程来处理,好处是简单,坏处是线程间通信效率并不高
实操-zynq下实现回传服务器
下面说明部分
- 建议也跟我一样拿着例程看,不然可能有种云里雾里的感觉.不需要黑金的哪个例程,就在sdk下面launch一个lwip_example的模板就可以了
- 下面介绍的一些结构体由于去繁就简的原则去除了一些没使能的宏定义.
bsp下使能lwip和dhcp
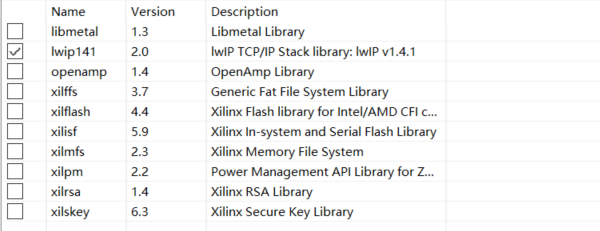
修改bsp(board support package),加入lwip
在lwip设置页,设置成RAW API 和使能dhcp
这里我们就只用RAW API了,因为看了应用用途,要用到socket API那天我还是想想要不要上linux吧
下面我们根据文档的步骤来说明一下,每一步的细节
初始化定时器和中断
因为在这里我们用到了dhcp,而且需要先初始化硬件.
这里不讲具体的操作了,我之前的博客有写,这里我们要留意一下他的回调函数timer_callback
1 | void |
这里主要做了两个操作,一个是dhcp的超时处理,另外一个就是第四步中两个标志位的判断,他们分别驱动一个定时器(1个250ms -> tcp_fasttmr 一个500ms -> tcp_slowtmr)主要用于协议中各个定时器的更新.
lwip初始化
对应第一步,这里就是对lwip中每一个层进行初始化
获取网络参数
这里需要先了解一个结构体 netif:
官方描述: Generic data structure used for all lwIP network interfaces.
别的先不管,看到我们需要在这里注册他的ip地址,网关和子网掩码
所以再看一个结构体 ip_addr:

1 | struct ip_addr { |
这里为了对齐,官方特意整了这个东西…
如果存在dhcp,而且dhcp成功的话,我们只要把ip,子网掩码,网关设置成0,先绑定好网卡地址(MAC),再去创建一个dhcp客户端获取ip地址就可以了.
1 | //指定MAC地址 |
然后在网络中注册dhcp 客户端:
1 | dhcp_start(echo_netif); |
这里又回到第一步中我们所注册的定时器,里面所指定的dhcp定时器,在这里一超时就会手动设置成静态ip,正好省了我解释怎么设置静态ip
注册应用
那么 上述的步骤相当于在网络中”站稳了脚步”,也可以理解为完成了网络层的配置,下面要进入运输层和应用层的注册.函数是start_application()
所以这里就要用到上面说到的protocol control block 协议控制块来指定一个tcp/udp中各个连接,这里tcp的pcb着实是太长太长了,我们来看看udp_pcb这个结构体的定义:
1 | struct udp_pcb { |
你大概就知道他是在干啥了.而且注册也不需要我们自己来干(因为tcp真的太复杂了)
我们只需要简单地:
1 | ~~~~start_application()~~~~ |
剩下的也不解读了,都是白菜级的函数调用
重头戏不在这里,在各种回调函数的注册,下面我们来分析一下:
第一步 tcp_accept(pcb, accept_callback);
跳进这个函数1
2
3
4
5
6void tcp_accept(struct tcp_pcb *pcb, tcp_accept_fn accept)
{
/* This function is allowed to be called for both listen pcbs and
connection pcbs. */
pcb->accept = accept;
}这个时候我们去看tcp_pcb是压根没有accept 这个属性的,因为他被定义在TCP_PCB_COMMON(type)这个宏定义里面的DEF_ACCEPT_CALLBACK.
1
所以我们到 tcp_accept_fn 中看看他是怎么定义这个回调函数的:
1
2typedef err_t (*tcp_accept_fn)(void *arg, struct tcp_pcb *newpcb, err_t err);
/** Function prototype for tcp receive callback functions. Called when data hasbeen received.
- @param arg Additional argument to pass to the callback function (@see tcp_arg())
@param tpcb The connection pcb which received data
@param err An error code if there has been an error receiving
Only return ERR_ABRT if you have called tcp_abort from within the
callback function! */
1
基于此 我们所注册的回调函数是:
1
2
3
4
5
6
7
8
9
10
11
12
13
14
15
16err_t accept_callback(void *arg, struct tcp_pcb *newpcb, err_t err)
{
static int connection = 1;
/* set the receive callback for this connection */
tcp_recv(newpcb, recv_callback);
/* just use an integer number indicating the connection id as the
callback argument */
tcp_arg(newpcb, (void*)(UINTPTR)connection);
/* increment for subsequent accepted connections */
connection++;
return ERR_OK;
}
在这个我们需要先跳进tcp_recv这个函数,肯定优势个注册接收函数的回调注册
1 | void tcp_recv(struct tcp_pcb *pcb, tcp_recv_fn recv) |
果不其然,然后这里我们再看看回调函数的格式定义:
1 | typedef err_t (*tcp_recv_fn)(void *arg, struct tcp_pcb *tpcb, |
这里终于出现了我们的tcp的帧结构了, 上文也介绍过这个pbuf 就是我们所想拿到的”信息”啦
3. 基于此,我们的接收回调函数是这样的:
1 | err_t recv_callback(void *arg, struct tcp_pcb *tpcb, |
其中 err = tcp_write(tpcb, p->payload, p->len, 1); 就是我们所说的回传了
!千万不要忘记 pbuf_free(p);
- 回到accept_callback(void *arg, struct tcp_pcb *newpcb, err_t err)
在这个函数中,我们看见了有一段莫名奇妙的:static int connection = 1;tcp_arg(newpcb, (void*)(UINTPTR)connection);
connection++;
那我们也是一步一步跳进去,看见:
1 | /** |
那他这里说,我们可以用这个东西来传递给回调函数,…这不也是云里雾里的,所以我们继续跳进去,发现他也是定义在TCP_PCB_COMMON 中的参数,所以现在我们来看看这到底是什么神仙东西:
1 |
|
这里还是没解释清楚,但是他说了 需要 LWIP_CALLBACK_API 支持才会起效,那我们继续看使能这个宏定义下面的注释:
1 | /* Function to call when a listener has been connected. |
好 这里了,这个参数就是个用户提供的参数…想干啥干啥.
5. 好啦 醉翁之意不在酒
其实绕来绕去是为了让大家看到LWIP_CALLBACK_API 这个使能位下的注释,他解释了为什么在accept_callback这个回调中需要重新建立一个新的tcp_pcb的原因.免得一些朋友看得乱了.
最后的最后 引一个图
结语
切勿 囫囵吞枣 穿凿附会